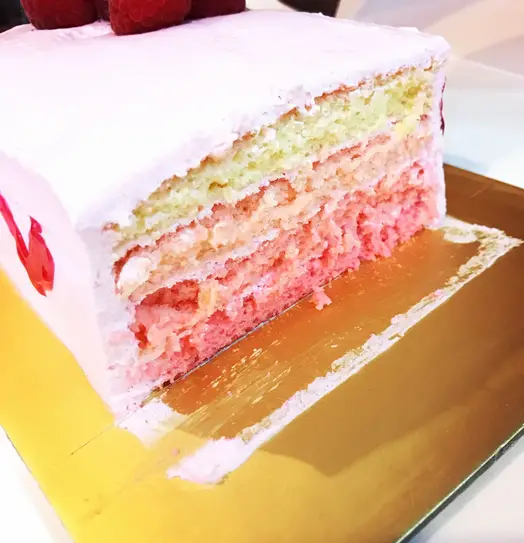
Vanilla Bean & Raspberry Pink Ombre Cake, just in time for Valentine’s Day

Happy almost Valentine’s Day, everyone! Man, it feels like it was just a holiday (Super Bowl Sunday, haha). And believe it or not, I was prepared for both of them.
BEHOLD:

and take a look inside:

Yes indeed, I learned how to make an ombre cake!
And I put three vanilla beans in there, so yeah, it turned out to be pretty tasty!
My friends at the Oregon Raspberry & Blackberry Commission sent me some delicious Oregon raspberry jam and I really wanted to use it to make a fun dessert. Then it dawned on me. Gradient cake. I mean ombre cake. Gradient cake is what you call it if you’ve been using Photoshop for more than 10 years (yes. Am old.) It took me a really long time to figure out that disconnect on the internet.

And here it is! I’m so happy with how it turned out. All you have to do is pick up the Wilton Mini Cake Pan set“. My recipe below is adapted from their house recipe for the Ombre Cake!
Vanilla Bean & Raspberry Pink Ombre Cake, just in time for Valentine’s Day
Ingredients
- 2 1/4 cups AP flour
- 2 tsp. baking powder
- 1/2 tsp. salt
- 3/4 cup (1 1/2 sticks) unsalted butter, softened
- 1 1/3 cups granulated sugar
- Insides of 1 vanilla bean, scraped out
- 2-3 Tbsp. milk
- 4 egg whites
- Red food coloring
- 8 oz. ish jar of raspberry jam
- 2 batches of vanilla bean buttercream or your favorite buttercream
Instructions
- Preheat the oven to 350 degrees. Lightly spray cake pans with nonstick spray.
- Sift together flour, baking powder and salt and set aside.
- Cream the butter and sugar together until fluffy. Add the egg whites one at a time while still mixing.
- Next, add the dry ingredients, alternating with tablespoons of milk.
- Add batter to the first pan. Then, add 3-5 drops of food coloring to the batter and stir to combine. Fill the second cake pan. Repeat adding more food coloring, then filling one pan with each color, for the remaining 3 cake pans.
- Bake 17-20 minutes or until a toothpick or cake tester comes out clean.
- Cool for a few minutes before turning out on a cooling rack. Cool completely before continuing. You may with to use the time while the cake is cooling to whip up whatever frosting you’d like to use on the outside.
- Use a serrated knife to cut off the crown of each cake layer, making them flat and stackable. Place either the lightest or the darkest layer down on the plate you want to use, then spread it with a generous layer of raspberry jam. Add the next shade layer in your ombre on top, then repeat with adding the raspberry jam layer. Continue alternating until the final layer is on top, then frost the whole thing with buttercream. I highly recommend making two batches so you can do a crumb coat.